TexReady Guides
TexReady is an online latex editor that allows users to create, edit, and collaborate on LaTeX documents.
It offers a user-friendly interface, real-time collaboration, and a variety of templates and examples to help users quickly get started with creating documents.
This documentation will provide a detailed guide on how to use the platform, including information on creating projects, working with the editor interface, previewing and exporting documents, and troubleshooting common issues.
 TexReady
Get started with TexReady Platform
This section will provide a step-by-step guide on how to create an account, log in, and create a new project on the TexReady platform. It will cover the following steps:
-
Create an account: Here is how to join the TexReady family and experience the power of LaTeX editing like never before.\
- Go to the sign-up page by visiting the link https://texready.ir/signup
- Fill out the registration form as following information: Full Name, Email, Password, Mobile number
- Click on the "Sign Up" button.
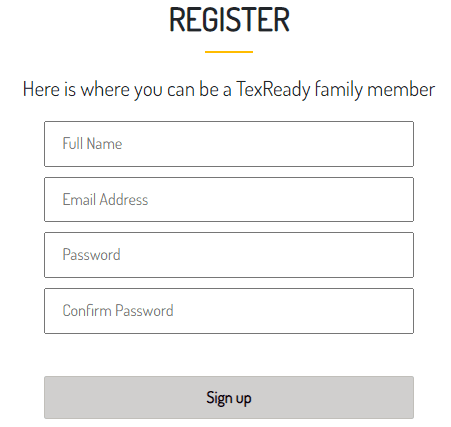 Register
Verify your mobile number by entering the SMS code sent to your mobile number. Once the mobile number is verified, your account will be created and you can log in to the platform.
-
Login: To access your dashboard and projects, just follow the following procedure:
- Go to the login page by visiting the link https://texready.ir/logn
- Enter your registered email address and password.
- Click on the "Log in" button.
You will be logged in to your account and can access the platform.
Working with Projects
here will provide information on how to create project, upload and organize files, and collaborate with other users on the TexReady platform.
After login, you will access your dashboard to manage your projects in LaTeX.
To create a new project from scratch on the TexReady platform, access the main page and select the "New Project" button. A drop-down menu will appear to provide options for creating a new project.
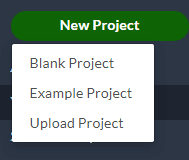 Create Project Options
- Blank project: A blank project with no pre-existing content, allowing users to start from scratch and build their document from the ground up.
- Example project: A project pre-populated with content and structure, allowing users to learn from and modify existing examples.
- Upload project: A project created by uploading existing files from the user's computer or other storage devices.
Editor Interface
TexReady's editor features a dual-pane layout, with the left side for writing and editing LaTeX code, and the right side displaying the real-time PDF output of the document as the user types, enabling users to easily view and make adjustments to their document.
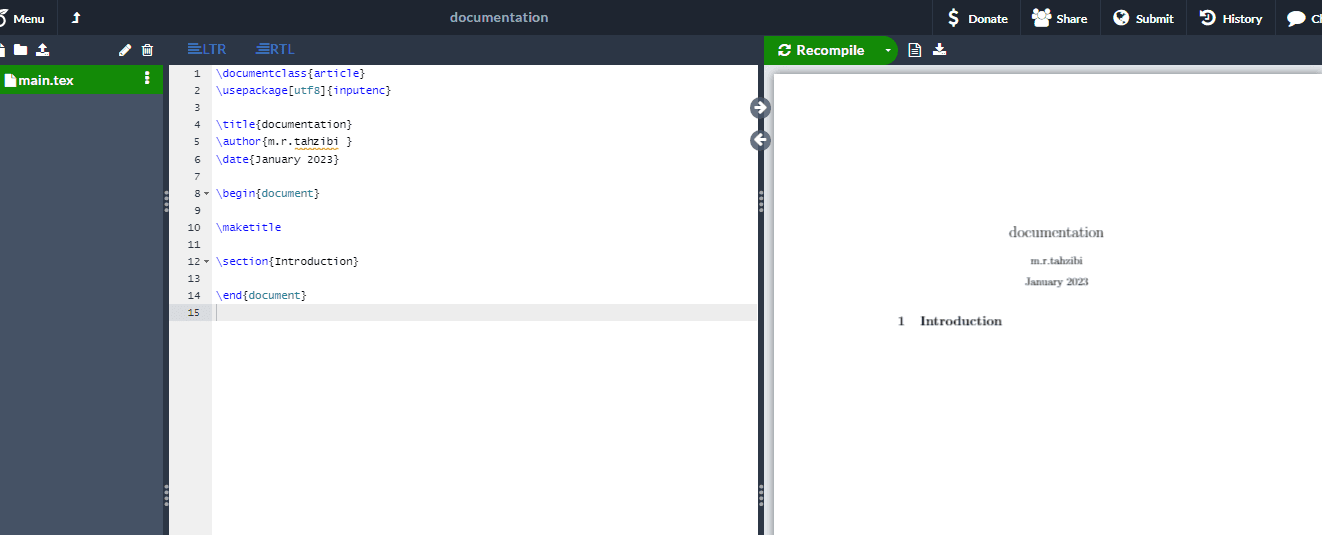 Editor Screen
Project Settings
After logging in and opening a project, the menu button provides access to all settings necessary to manage and customize the project as desired.
 Project Menus
The project's menu include:
Project functions, allows for project download, syncing with Dropbox, Git or GitHub and displaying the compiled word count.
Project settings, that enables you to configure the editor and compilation settings.
Help group, which provides assistance on TexReady and your project.
Project Functions:
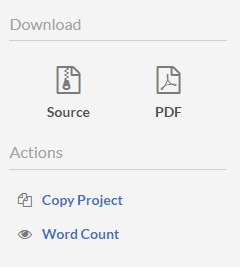 Project Functions
The Download Source" button downloads the project as a .zip file including all the LATEX source files. It uses files listed in the project's file tree panel. The downloaded .zip file will contain the same .pdf file as when it was uploaded.
To avoid confusion, it is recommended not to upload PDF files with the same name as the main .tex file or expected output. Also, remove other compilation-generated files such as *.run.xml, .mtf, *.lof, *.bf from the file list panel.
The "Download PDF" button in the project's menu downloads the latest compiled output of the project.
Copy Project: This ption creates a new copy of the current project, with the user as the owner.
The new project will use the current default version of TeX Live on TexReady, which may differ from the original project.
Word count: This feature calculates all words in your main .tex file.
Project Settings:
This section allows users to configure various settings related to the editor and compilation of the project.
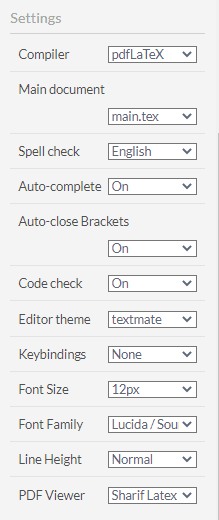 Project Settings
| Setting Title | Description |
|---|---|
| Compiler | allows users to select a preferred LATEX compiler from options such as LaTeX (with dvipdfm), pdflatex (default), XeLaTeX, and LuaLaTeX. All compilers will generate a PDF as the final output on TexReady. |
| Main Document | allows users to set a specific .tex file to be used as the primary source for compilation |
| Spell Check | allows users to select a spell-check language dictionary provided by Aspell or turn off spell-checking. |
| Auto Complete | enables/disables suggestions for LaTeX commands as they are typed. More information on how this works can be found in our blog post. |
| Auto-close brackets | allows users to enable or disable the automatic addition of corresponding characters ], [, $ are typed. |
| Code Check | allows users to enable or disable the syntax-checker, catching common syntax errors before the LATEX compiler runs. Users can also disable Code Check for specific files or lines of code. |
| Editor Theme | allows you to choose from various editor themes and syntax-highlighting options for the Source code view in TexReady. Note that this setting does not affect the RichText view and check that your file has the .tex extension for proper syntax-highlighting. |
| Overall theme | This is a user-specific setting. Sets the overall interface (file tree panel and top bar) theme: Default (dark) or Light. |
| Keybindings | allows users to choose between three keybinding modes: None, Vim, and Emacs. Note that some shortcuts may not be fully supported. |
| Font Size | Adjust the font size of the text in the editor. Zoom level of the output PDF can be controlled in the preview panel. |
| Font Family | Set font family for the Source view mode editor, if the font is installed on your computer. Override in browser font settings for different monospaced font. |
| PDF Viewer | TexReady built-in viewer or browser viewer. Note: browser viewer may have different GUI controls and doesn't support "go to location in code/PDF" feature. After recompile, it will display first page instead of previous viewed page. |
Tips
Users also have the option to run plain TeX, XeTeX or LuaTeX on TexReady.
Project Navbar Menus
The project navbar in TexReady includes options for chatting, viewing history, submitting, sharing, and donating.
 Navbar Menu
Donate: allows users to support TexReady by making a financial contribution.
Share: allows users to share their TexReady project with others by providing them with a link or by inviting them to collaborate on the project.
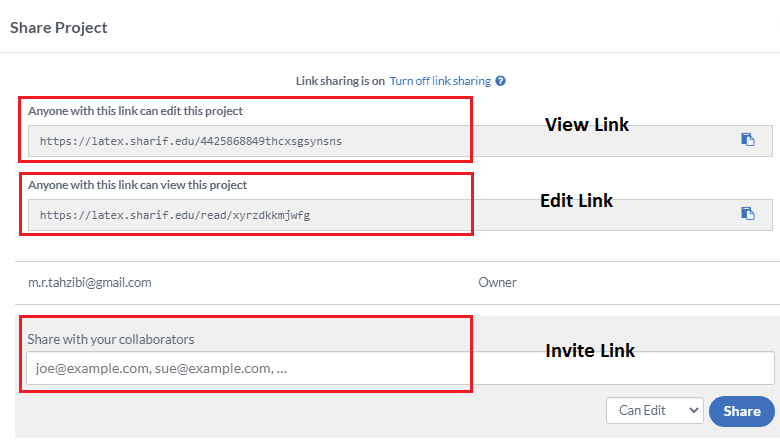 Share Project
Submit: allows users to create a template of their current project and share it with their group members.\
- Title: A brief name for the template
- Description: A brief summary of the template
- Access: Select a local group where the template will be shared with its members.
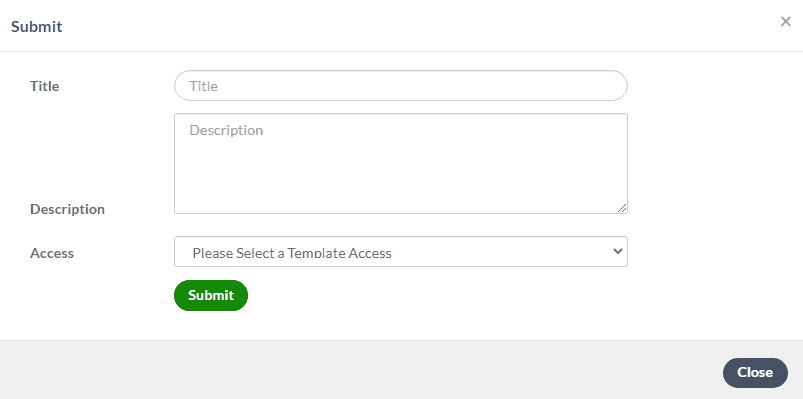 Submit project
Templates created and submitted through the "Submit" menu are only visible to members of the user's local groups and not to the public template library of the platform.
History
By this option, users can view and access their previous project revisions, and revert to a specific point in time.\
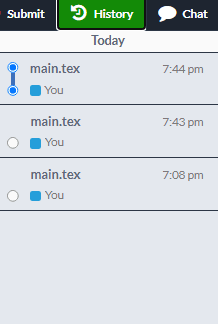 Project History
To access previous versions of your project, click on the labeled item in the history panel to navigate to that specific point in time.
For example, if a user accidentally deletes a section of their project, they can go back to a previous revision where that section still existed.
Chat
Chat feature allows for communication between project collaborators
Including Files and Images
Learn how to easily add images to your documents on TexReady by uploading them from your computer or a URL and including them in your documents.
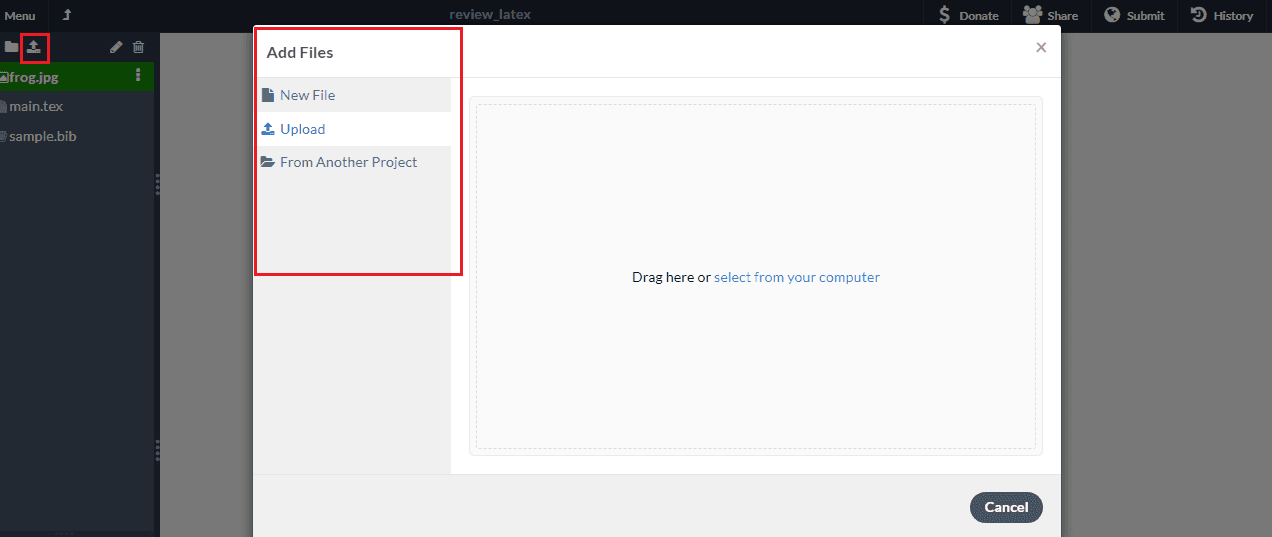 Add file
images from your computer or enter a URL to a image hosted online. Once uploaded, you can insert the image in your document using the appropriate LATEX command, such as \includegraphics.
Preview and Export:
Preview and export options in TexReady allow users to view and download their typeset PDF and project files in various formats.
1- To download the PDF file:
- Click the Menu button and select the PDF icon.
- Use the PDF download button displayed in the PDF viewer.
2- To download a project
- use the Menu button and select the Source icon to download a .zip file of the project on your device.
3- To download multiple projects
- Navigate to the "Back to your projects" icon
- Select the desired projects by ticking the corresponding check-boxes
- Choose the download button to initiate download of a .zip file
- The downloaded .zip file contains further .zip files for each selected project.
FAQs:
We have prepared a list of frequently asked questions that can be found by visiting our FAQs page.